Wednesday, March 28, 2012

Warm brownies on an Autumn day...


I just took a warm batch of brownies out of the oven and couldn't resist cutting a corner right out of the tray... Brownies are good, but warm brownies take it to another level.
Dark chocolate gets moved to the back of my pantry shelf in summer when there are raspberries and other beautiful stone fruit to distract me, but as Autumn creeps up on us and the days get cooler, I start dreaming up recipes with cinnamon, preserved ginger and dark chocolate. There's something just RIGHT about brownies in Autumn.

So, while I am supposed to be costing a recipe for a function this week, putting in orders and just generally being productive, here I am blogging about this brownie recipe which is really a MUST in any bakers' repatoir. I know, I know, you've heard it all before and I bet you've got your own favourite brownie recipe you swear by.

Well, let me tell you a little about how this recipe became my favourite and I may just convince you that this it's worth trying. It's quite funny really, but like many pastry chefs, my love for baking started with a humble brownie recipe. Nothing fancy, no raw chocolate, cranberries or white chocolate chips, just a good ol' faithful brownie, made with regular ingredients.
From there I never did get into the way-out flavours, to me it's more about getting that balance between a dense texture, an intensely dark chocolate taste and just the right amount of sugar - the perfect compliment to a cappuccino, is how I like to think of it.

This recipe landed in my inbox when I asked a fellow pastry chef friend of mine if I could try the recipe she was given when she was at a very well known chef school many years ago. I was looking for a recipe with a dense texture, obviously, rule number one when baking brownies is not to over bake them, but there is still something to say for a reliable recipe, that can be baked over and over and never seems to let you down. I'm hoping you sense my passion here.

So, a few tweaks later, this is it, I can confidently say. At most, I add chopped hazelnuts because there's something just SO right about combining hazelnuts and dark chocolate but I'll allow you to take it from here and add whatever your heart desires, to make it yours.


Brownie Recipe

175g butter, plus extra for greasing
5 large eggs
220g castor sugar
220g brown sugar
175g cake flour
100g good quality cocoa powder
100g hazelnuts, roughly chopped (optional)

Preheat oven to 170°C. Line a brownie tray or large cake tin with greaseproof paper after greasing it generously.

Very gently melt the butter in a saucepan and leave it to cool. Using a wooden spoon, beat the eggs with the sugar in a large bowl until creamy and smooth, then slowly stir in the cooled butter.

Stir the flour and cocoa powder into a large bowl. Gradually add the egg mixture until smooth, then fold in nuts and keep a few aside to sprinkle on top.

Pour the mixture into the prepared tin and bake for 25 – 30 minutes until risen with a cracked, crusty top. Be very careful not to overcook them, as the cooking time may vary slightly in different ovens.

Cool in the tin for about an hour, or until completely cool before cutting them in squares. I like to dust them with cocoa powder.
Variations - adding cranberries, white chocolate chips, dark chocolate chips, macadamian nuts, pecan nuts and the list continues...


Thursday, March 22, 2012

Berry Bliss

So much for new beginnings…This years' blogging is off to a not-so-good start, but with a little inspiration and better time management, VOILA! We have a new post!

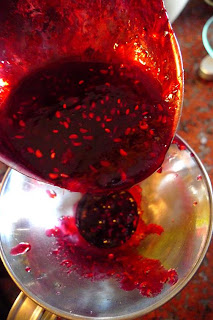
I have had this blog post brewing for some time now and am dying to share this very easy, anyone-can-do-it jam recipe as well as these fun pictures I took in December. Yes, you heard right, these photos were taken in December! I have however, resisted the temptation to scrap the idea all together, as Autumn in sneaking up on us and the idea of a summer berry jam seems kind of, well, out-dated.

In December, every December, I get this home-sick longing to just be at my parents' old house, just breathing in the familiarity and reminiscing back to my childhood in that beautiful house with all its' creaks and its' magical big garden. As I’ve mentioned so many times on this blog, the thing I love most about those times is how my family gravitate towards the kitchen and what to eat for the next meal becomes the order of the day (excuse the pun). Not only that, but there always seems to be some mini harvest of sorts, be it potatoes or artichokes or berries…

So, I’m going to be very honest with you. My mum and I are very similar in the fact that we like unfussy cooking and recipes aren’t taken too seriously, but rather used as inspiration – we really do believe that almost every recipe can be improved and added to. So when I called her to ask her for the recipe of her mixed berry jam, the one we made only 3 months ago, her answer went something like, “Oh, a recipe? It’s about 800g sugar to 1 kg of mixed berries”. And that was that, need I say more.

This leaves me with the sad conclusion that no jam you or I for that matter, make will EVER be the same as last years summer berry jam. I must say, that does put a smile on my face because I’m sure the next batch will be pretty awe-inspiring with some orange zest added to it…
Mixed Berry Jam

Jam is one of those things that might seem a little daunting to try for the first time and it’s also something you need to get a FEEL for. So, I think it’s going to be easier to resign yourself to the fact that there will be at least one batch of jam that you will not be entirely happy with. Cooking jam too long will give you a very sticky thick jam, perfect for jam cookies and a jam that’s too runny? Well, I’ll leave you to be creative with that one…

Note: This recipe has no pectin or gelatin as we simply used a few handfuls of berries that were less ripe. You might have to add pectin if your berries are shop bought.


Ingredients:

1 kg mixed berries (raspberries, blackberries, blueberries)

800g white sugar (this can be reduced to 500g for a less sweet version)

Juice of 1/2 lemon

Method:

Put the berries in a large bowl and sprinkle the sugar as well as the lemon juice over it. Leave it to rest for about two hours.

While you are waiting you can start preparing the jars. Now, keeping in mind that I like to take the shortest and  easiest method when cooking, do the following: Heat your oven to 200 degrees Celsius. Rinse your jars and place them in the oven for 5-7 minutes or until dry and very hot. Remove them with tongs. Boil the kettle and pour hot boiling water over the lids and allow them to stand in the water for 5-10 minutes.

Put the berries in a big pot and place this on a medium heat. Bring it to the boil and boil it for 30 minutes, stirring occasionally. A light coloured foam will appear on the surface, gently spoon this off. This will ensure a clear jam. After 30-40 minutes the jam should be thick and reduced. Spoon a little bit on a cold plate and leave it to cool to check the consistency.

Gently pour into hot jars and seal with hot lids. Be sure to wash your hands and not touch the inside of the jars or the bottom of the lids.

Store in a cool, dry place.

Yield: 4-6 medium sized jam jars